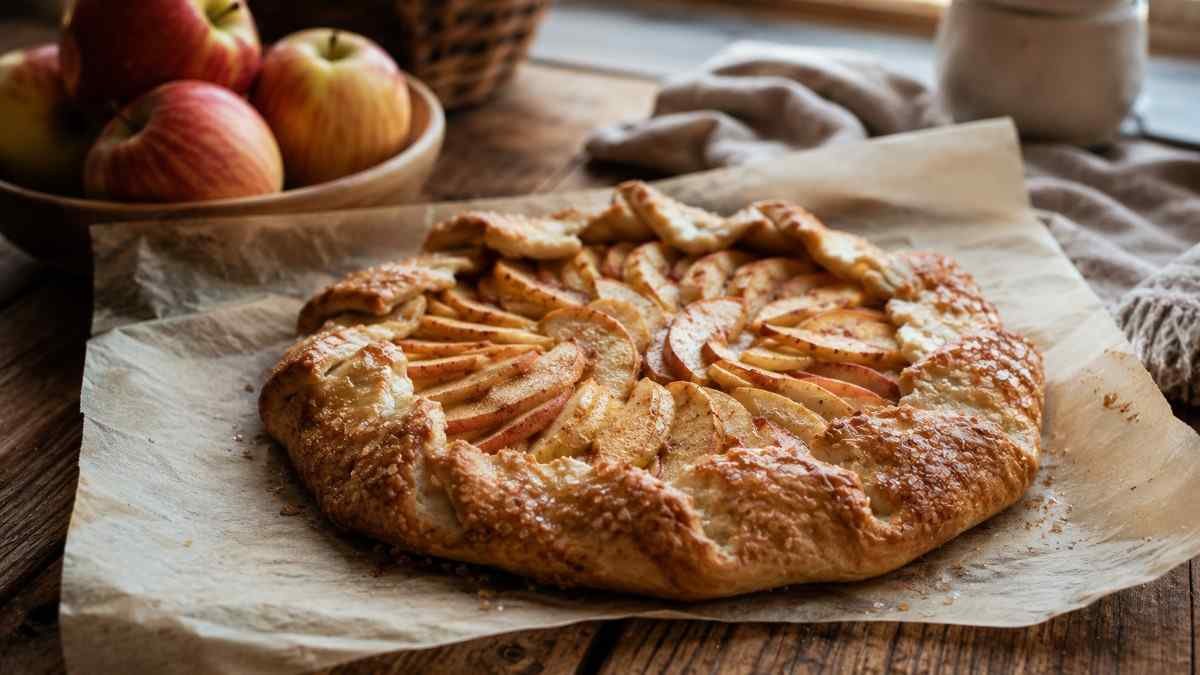


How To Bake Sourdough Bread For A Rustic Artisan Loaf
Nothing beats the smell of a crusty loaf cooling on the counter after a slow, hands-on bake. In this guide on how to bake sourdough bread, you’ll learn a rustic beginner method using active starter, bread flour, warm water, and salt, with clear cues that help your dough rise beautifully.
Key Takeaways
- Use bubbly starter, not sleepy starter.
- Build strength with stretch-and-folds.
- Let bulk fermentation guide the loaf.
- Cold proof for flavor.
- Cool fully before slicing.
Gather Rustic Ingredients
Good sourdough starts with simple ingredients, but each one has a job to do.
Active Starter
Use 100 g bubbly, active sourdough starter. It should be fed, doubled, airy, and pleasantly tangy before mixing. A weak starter is the fastest route to a flat loaf, so wait until it looks lively.
Your starter should smell fresh, mildly sour, and slightly fruity. That tells you the wild yeast and good bacteria are active enough to lift the dough.
Bread Flour And Water
Use 500 g bread flour and 375 g warm water around 90°F or 32°C. Bread flour gives stronger gluten, which helps trap fermentation gases and create an open-crumb artisan structure.
Warm water wakes the starter gently without shocking it. Avoid hot water, because too much heat can slow or damage fermentation.
Salt For Flavor
Use 10 g fine sea salt or kosher salt. Salt strengthens dough, slows fermentation slightly, and makes the loaf taste balanced instead of bland.
Mix it well so every slice has flavor. In rustic baking, simple ingredients still need careful handling.
Mix The Dough
This is where flour, water, starter, and salt become a shaggy dough ready for slow fermentation.
Whisk Starter And Water
In a large mixing bowl, whisk the active starter with warm water until mostly dissolved. This spreads wild yeast and lactic acid bacteria evenly through the dough.
Add bread flour and salt, then mix until no dry flour remains. The dough should look sticky, rough, and rustic, not smooth yet. Cover it with a damp towel or plastic wrap.
Rest For Autolyse
Let the dough rest at room temperature for 1 hour. This autolyse-style rest hydrates the flour, relaxes the dough, and makes gluten development easier without heavy kneading.
After the rest, the dough should feel softer and more stretchy. That quiet pause is one easy way to improve texture in beginner sourdough bread.
Stretch And Fold
This gentle method builds dough strength while keeping the crumb airy and tender.
Build Dough Strength
With wet hands, grab one edge of dough, stretch it upward, and fold it into the center. Rotate the bowl a quarter turn and repeat 4 to 5 times.
Cover the bowl and rest for 30 minutes. Repeat the stretch-and-fold process 3 to 4 times over the next 2 hours, keeping your hands damp so the dough does not stick.
Read The Texture
Each round should make the dough smoother, stronger, and more elastic. At first it may slump, but later it should hold shape and pull from the bowl more cleanly.
Avoid adding extra flour during this step. Too much flour can tighten the crumb and steal the soft, chewy interior that makes rustic sourdough satisfying.
Bulk Fermentation
Bulk fermentation is the first main rise, and it decides much of your loaf’s final texture.
Watch The Rise
Leave the covered dough at room temperature, ideally 70°F to 75°F or 21°C to 24°C, for 4 to 8 hours. The dough should increase roughly 50 to 75 percent in volume.
Look for bubbles along the sides, a slightly domed surface, and a gentle jiggle when you shake the bowl. These signs matter more than the clock.
Avoid Overproofing
Under-fermented dough often bakes up dense, pale, and tight. Over-fermented dough feels slack, sticky, and hard to shape because the gluten has weakened.
For beginners, stop bulk fermentation when the dough is clearly puffy but still has strength. This balance gives better oven spring and a more open crumb.
Shape The Dough
Shaping turns loose dough into a loaf that can rise tall instead of spreading flat.
Pre-Shape First
Turn the dough onto a lightly floured work surface. Gently shape it into a loose round, then let it rest for 20 to 30 minutes. This bench rest relaxes gluten.
Use light hands here. Pressing too hard can knock out the air pockets you built during fermentation.
Create Surface Tension
After resting, fold the edges toward the center and roll the dough into a neat, taut ball. The outside should feel smooth and slightly tight.
This tension helps the loaf expand upward in the oven. It also gives your score a clean path to open during baking.
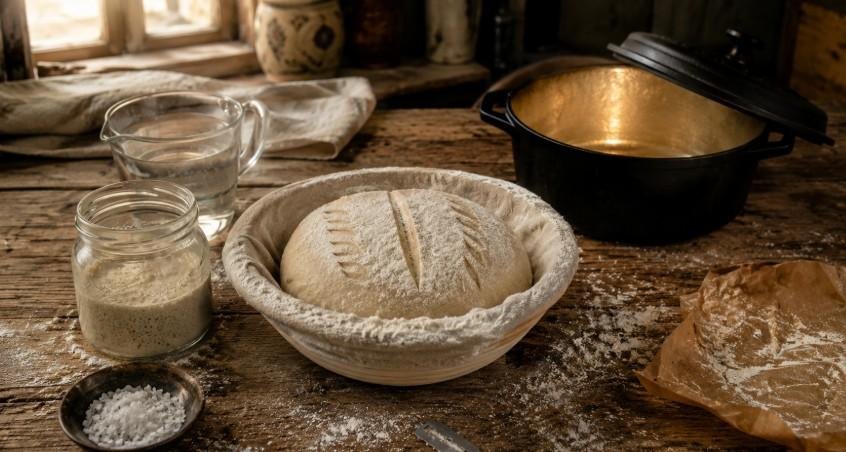
Cold Proof Overnight
A long, cold proof builds deeper flavor and makes the loaf easier to handle.
Prepare The Basket
Dust a banneton or towel-lined bowl generously with rice flour. Place the dough upside down, smooth side down and seam side up, so it releases cleanly later.
Cover the basket tightly. Refrigerate overnight, or cold proof for 12 to 48 hours for a stronger tang and more developed aroma.
Bake From Cold
Cold dough is easier to score and holds its shape better when transferred to the Dutch oven. That makes it helpful for first-time sourdough bakers.
The overnight rest also adds complexity without extra work. This is where rustic sourdough gets its bakery-style personality.
Score And Bake
This how-to section shows how to bake sourdough bread with steam, heat, and a bold crust.
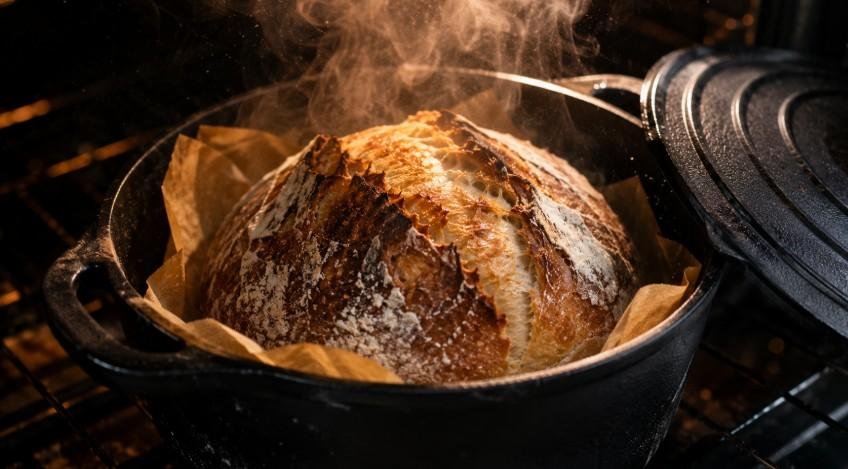
Preheat The Dutch Oven
Preheat the oven and a heavy-duty Dutch oven to 450°F or 230°C for 30 to 45 minutes. Strong heat gives the dough fast oven spring.
Turn the cold dough onto parchment paper. Dust off excess flour and score a quick 1/8-inch-deep slash with a bread lame or sharp knife.
Bake Covered And Uncovered
Lower the dough into the hot Dutch oven using the parchment. Cover and bake for 30 minutes so trapped steam keeps the crust flexible while the loaf expands.
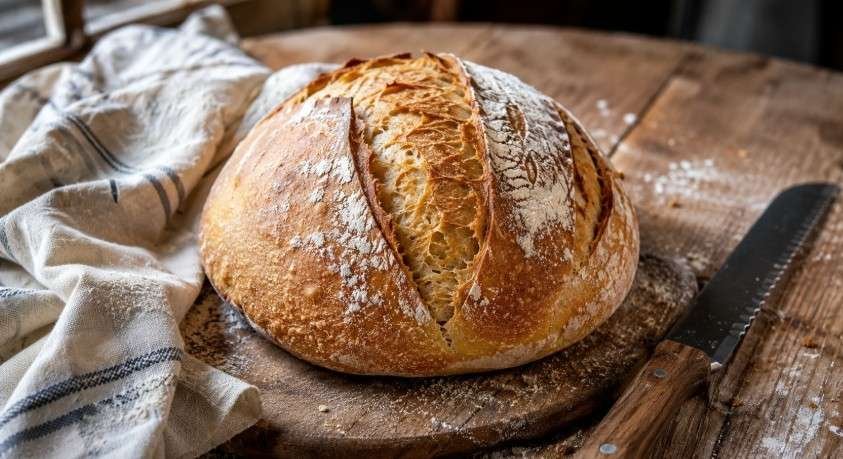
Remove the lid and bake 15 to 20 minutes more, until the crust turns deep golden brown. Cool the bread on a wire rack for 2 to 3 hours before slicing.
Beginner Baking Tips
Small adjustments can make your first loaf calmer, cleaner, and more reliable.
Control Temperature
Warm kitchens speed fermentation, while cool kitchens slow it down. If your dough is sluggish, move it to a warmer spot, but avoid direct heat.
A dough temperature near room comfort usually works well. Sourdough thrives when it is warm enough to rise but not so hot that it races ahead.
Slice At The Right Time
Fresh sourdough keeps cooking inside after it leaves the oven. Cutting too soon can make the crumb gummy, even when the loaf was baked correctly.
Wait at least 2 hours for the cleanest slices. The crust will stay crackly, and the inside will set into a chewy, open texture.
Frequently Asked Questions
1. What Is The Best Method For Baking Sourdough?
The best method is using a preheated Dutch oven because it traps steam, supports strong oven spring, and creates a crisp crust with a tender interior.
2. What Is The Best Sourdough Bread For Diabetics?
A whole-grain, long-fermented sourdough may be a better option in small portions because it offers more fiber, but personal medical guidance is still important.
3. What Temperature Do You Bake Sourdough Bread At?
Bake sourdough bread at 450°F or 230°C in a preheated Dutch oven, covered first for steam, then uncovered until deeply golden and crisp.
4. What Is The Biggest Mistake Beginners Make With Sourdough Bread?
The biggest mistake is using weak starter or rushing fermentation. Strong starter, visible dough bubbles, and proper rise matter more than following time alone.
Crust, Crumb, And Happy Hands
Learning how to bake sourdough bread is a rustic baking habit worth keeping. With active starter, bread flour, warm water, salt, stretch-and-folds, patient bulk fermentation, and an overnight cold proof, you can bake a classic open-crumb artisan loaf with a crackly crust. Trust the dough, cool it fully, and enjoy every chewy slice.