


How to Deep Clean Your Kitchen Step by Step
I always feel like the kitchen is the one room that can look clean on the surface but still hide crumbs, grease, stains, and odors in the corners. That is why How to Deep Clean Your Kitchen Step by Step is not just about wiping counters. It is about following the right order so every cabinet, appliance, sink, and floor area gets cleaned without doing the same job twice.
A good deep clean makes the kitchen feel fresher, safer, and easier to use. Whether you cook daily, host family meals, or just want your space to feel reset, this method helps you clean from top to bottom in a simple, practical way.
Why the Right Kitchen Cleaning Order Matters
The biggest mistake many people make is starting with the floor or counters. Dust, crumbs, and grease from cabinets, shelves, vents, and appliances will fall downward as you clean. That means the best method is always top to bottom.
Start with decluttering, then move to high surfaces, cabinets, appliances, counters, sink, trash area, and finally the floor. This order saves time and gives better results.
Kitchen Deep Cleaning Supplies You Need
Before starting, gather everything in one place. You may need microfiber cloths, a sponge, scrub brush, dish soap, baking soda, white vinegar, disinfectant, degreaser, trash bags, gloves, mop, broom, vacuum, and paper towels.
For delicate surfaces like marble, granite, stainless steel, and wood cabinets, use gentle cleaners and test a small hidden spot first. Avoid mixing cleaners, especially bleach and vinegar, because that can create harmful fumes.
Step 1: Clear Counters and Remove Trash

Start by removing everything from the countertops. Put away mail, jars, small appliances, dishes, and food containers. Toss expired food, empty packaging, and old sponges. Take out the trash before you begin deeper cleaning. This instantly makes the kitchen feel more open and gives you room to work.
Step 2: Wash Dishes and Empty the Sink
A full sink slows everything down. Wash dishes, load the dishwasher, and clear the drying rack. Once the sink is empty, rinse away loose food bits so you can properly scrub it later. This step also helps you see what needs attention around the faucet, drain, and garbage disposal.
Step 3: Dust High Areas First
Use a microfiber cloth or extendable duster to clean ceiling corners, light fixtures, cabinet tops, vents, and the top of the refrigerator. These areas collect dust and grease, especially in busy cooking spaces.
Step 4: Deep Clean Cabinets and Drawers
Empty one cabinet or drawer at a time. Wipe crumbs from the inside, clean the shelves, and check for expired spices, stale snacks, or unused containers.
Use a damp cloth on cabinet doors, handles, and knobs. Grease often builds up around hardware, so use a toothbrush for edges and grooves. For wood cabinets, avoid soaking the surface and dry it right away.
Step 5: Clean the Refrigerator and Freezer

Remove food from one section at a time. Throw away expired sauces, wilted produce, and forgotten leftovers. Wipe shelves, drawers, and door bins with warm soapy water.
Clean sticky jars before putting them back. For odors, place an open box of baking soda inside. Do not forget the freezer. Remove old frozen food, wipe spills, and organize items by category.
Step 6: Clean the Oven, Stove, and Microwave
For the oven, remove racks and soak them in warm soapy water if needed. Wipe crumbs from the bottom and use an oven-safe cleaner according to the label.
For the stovetop, clean stove grates or drip pans and scrub away grease. Clean the control knobs carefully because they collect fingerprints and food splatter. For the microwave, heat a bowl of water with lemon slices for a few minutes. Let the steam loosen stuck food, then wipe the inside clean.
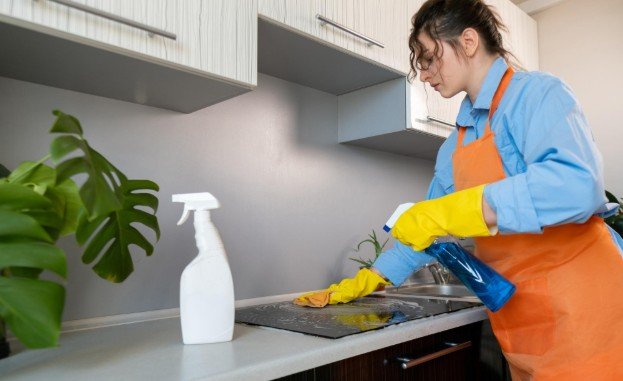
Step 7: Degrease Countertops and Backsplash
Now wipe the backsplash, wall behind the stove, and all countertop surfaces. Use the right cleaner for your counter material. Granite and marble need gentle products, while laminate and tile can usually handle mild dish soap.
Move small appliances and clean underneath them. Toasters, coffee makers, mixers, and air fryers often hide crumbs and grease at the base.
Step 8: Scrub the Sink, Faucet, and Drain
Sprinkle baking soda in the sink and scrub with a sponge. Rinse well and wipe the faucet, handles, and drain area. For stainless steel sinks, dry with a microfiber cloth to reduce water spots.
If your garbage disposal smells, run cold water and grind a few small citrus peels. You can also clean the splash guard because it often traps grime.
Step 9: Clean Switches, Handles, and Trash Can
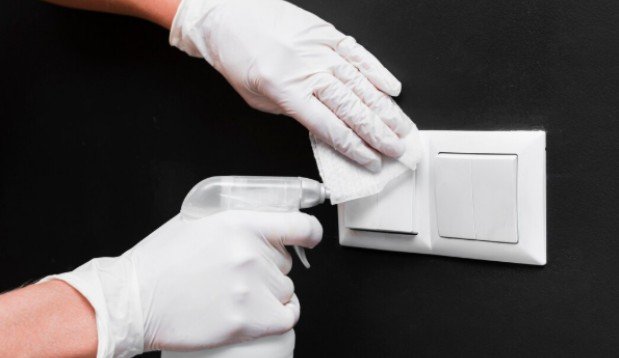
Wipe light switches, outlet covers, drawer pulls, appliance handles, and pantry doors. These high-touch areas are easy to forget but collect germs and grease. Then clean the trash can inside and outside. Wash the lid, bottom, and rim. Let it dry before adding a fresh liner.
Step 10: Sweep, Vacuum, and Mop the Floor
Finish with the floor. Sweep or vacuum under the table, cabinets, and movable appliances. Pay attention to baseboards and corners.
Mop with a floor-safe cleaner. Tile, vinyl, hardwood, and laminate each need different care, so avoid using too much water on wood or laminate.
Kitchen Deep Cleaning Checklist
Use this quick checklist when you want a full reset:
- Clear counters
- Take out trash
- Wash dishes
- Dust high areas
- Wipe cabinet tops
- Clean cabinet doors and handles
- Empty and wipe drawers
- Clean refrigerator and freezer
- Scrub oven, stove, and microwave
- Wipe backsplash and counters
- Clean small appliances
- Scrub sink and faucet
- Freshen drain or disposal
- Wipe switches and handles
- Clean trash can
- Sweep and mop floors
How Often Should You Deep Clean Your Kitchen?
For most homes, a full deep clean once a month works well. If you cook every day, fry foods often, or have a large family, some tasks may need to be done every two weeks.
Daily cleaning should include dishes, counters, stove spills, and trash. Weekly cleaning should include floors, microwave, sink, and appliance handles. Seasonal cleaning can include pantry organizing, cabinet tops, refrigerator condenser coils, and hard-to-reach areas.
Frequently Asked Questions
1. What is the fastest way for How to Deep Clean Your Kitchen Step by Step?
Start by clearing clutter, then clean from top to bottom, handle appliances, scrub the sink, and finish with the floor.
2. How long does a kitchen deep clean take?
A basic deep clean may take two to three hours. A larger kitchen with heavy grease or full cabinet cleaning may take longer.
3. Should I deep clean before or after organizing?
Declutter first, deep clean second, and organize last. This keeps clean shelves and drawers ready for the items you actually use.
4. What is the most forgotten area in kitchen cleaning?
Cabinet handles, range hood filters, trash can lids, switch plates, and under small appliances are often missed.
Final Thoughts
When I want my kitchen to feel truly fresh, I do not start randomly. I follow the same order every time because it keeps the process simple and prevents extra work. How to Deep Clean Your Kitchen Step by Step works best when you clear clutter first, clean high areas before low ones, focus on appliances, and finish with the sink and floors.
A cleaner kitchen is easier to cook in, easier to organize, and more comfortable to use every day. With this routine, the whole space feels brighter, fresher, and ready for the next meal.